Unusual Crop for October: Ramps

2018 Ramps and eggs. Jeanine Davis program, 2022

Ramps

For October, I’m writing about ramps. October is a good time to plant ramps bulbs and seeds. Bulblets are better planted in early spring. Ramps thrive in USDA Winter Hardiness Zones 3-7. Some of this material is from my second edition of Sustainable Market Farming, and the sources quoted here.

Today, ramps are a wild-edible delicacy in most places and defines a sort of Appalachian or Eastern U.S. “terroir”, but what was once a commonly found plant is now a rarity as land development and sprawl, deforestation, and over-harvesting by some foragers has decimated the population.

Ramps, (Allium tricoccum) (aka wood leeks or wild leeks) combine some of the flavors of leeks, onions, and garlic. They are a traditional and newly fashionable food. Ramps are a native woodland perennial that can be wildcrafted sustainably or raised in a suitable woodland.

“The ramp has broad, smooth, light green leaves, often with deep purple or burgundy tints on the lower stems, and a scallion-like stalk and bulb. Both the white lower leaf stalks and the broad green leaves are edible. The flower stalk only appears after the leaves have died back, unlike the similar Allium ursinum, (Ramsons) in which leaves and flowers can be seen at the same time. Ramps grow in close groups strongly rooted just beneath the surface of the soil.” – Cultivation of Ramps, North Carolina State University

It takes a ramp plant 7 years to reach sexual maturity from seeds and produce more seed. The plants are mature when their leaves reach heights of 6”-8” (15-20cm).  From planting bulblets it takes 3-5 years to reach harvest size. So I’ll start by explaining how to wild-craft the leaves, then move on to info on establishing your own ramps.

Ramps research NC State ramps harvest study Jeanine Davis program, 2022

Harvesting ramps leaves

Ramps are a spring ephemeral of deciduous forests that can be wild-harvested sustainably for 1 month in the eastern half of the US and Canada, starting when tree buds appear. By late May, the leaves yellow and die back, and a flower stem emerges.

Wild ramps are being over-harvested, and it is important to make sure that not all these wild culinary delights vanish and they are still able to find their way onto plates in a sustainable fashion. Take only what you can use in a few days. Only 5% to 10% of the ramps in a patch should be harvested each year to ensure their future survival. The most sustainable harvest method is to cut only one leaf, leaving the bulb and second leaf to continue growing. Before harvesting from public lands, check local regulations. There may be limits on where, when and how much.

There are some toxic look-alikes so be sure the plants you pick smell like onion or garlic. If you’re unsure, let a knowledgeable forager confirm your find or just don’t pick them. Do not pick Lily of the Valley (Convallaria majalis) or False hellebore (Veratrum genus) by mistake.

Harvesting the leaves with bulbs attached is also possible, if the area has plants to spare. To harvest, use a sharp strong knife, such as a hori-hori and slide it into the soil at an angle. Cut the bulb just above the roots, and leave those in the ground to regrow. Take only the leaves and bulb. Some say a wildcrafted whole ramp (with bulb intact) is never a sustainably harvested ramp. Bulbs can be frozen for later use.

See the video How to Sustainably Harvest Ramps from Carriage House Farm. It uses a similar knife technique but removes only stem and leaves.

Ramps bulbs. Gates Hill Farm

Buy ramp seeds, bulbs and bulblets

To get started, you can buy seeds year-round, bulbs in September and October, and bulblets in late winter at Gates Hill Farm rampfarm.com. Once you have established some plants, you can divide and replant annually.

There are about 50 seeds per ounce, roughly 2 per gram. Ramp seeds require a warm period followed by cold stratification to break dormancy. If there is not an adequate warm period after sowing, the seed stays dormant until the second spring. This explains the wide range of 6-18 months to germinate ramp seeds. It’s easy to see how wild ramps get seriously over-harvested.

Collect ramp seeds in August and September

If you were wild-crafting ramps in spring, late summer/early fall is time to pay the piper. Collect seed and scatter it over the patches you dug from. Or collect seed to grow in woodlands at home – without of course, taking too many away from a place they could grow naturally.

Establishing a ramp planting

Ramps grow best in deciduous woodlands with adequate moisture. There are projects to re-establish ramps in a number of regions in the Eastern United States.

Carriage House Farm is one such attempt by Grow Appalachia, which is a program of Berea College in Kentucky, Grow Appalachia works with farmers, gardeners, ranchers, and conservationists across a five state area to reintroduce old native and heirloom species of plants.  Ramps is/was one plant in this program. https://carriagehousefarmllc.com/journal/2019/4/24/on-ramps?rq=ramps

Jeanine Davis, Extension Specialist, Herbs/Organics/Specialty Crops/Vegetables, Horticultural Science, NCSU, ran a ramps harvest study in 2022.

NC State ramps harvest study Jeanine Davis program, 2022

Resources with more on Ramps

A Good Resource for Unusual Vegetables and Fruits

https://www.savannainstitute.org/publications/

Uncommon and perennial fruit and nut crops, agroforestry, silvopasture. Dig around the website – there’s more info than at first apparent.

Many other publications on tree crops, Key Perennial Crops, black walnuts, Asian pears, persimmons, honeyberry, mulberry, serviceberry, aronia, cider apples.

Unusual Crop for September – Less Common Greens

Less Common Greens – Celtuce, Jewels of Opar, Chrysanthemum Greens, Eat-All Greens

In my monthly series on unusual crops,  I wrote about Peanuts in May

In June I wrote about Bug-Resistant Summer Squash Substitutes

In July I wrote about Squash Blossoms and Other Edible Flowers

In August I wrote about Kohlrabi

This month, I’m writing about unusual greens for late fall and winter meals.

Spring Tower celtuce from Johnny’s Selected Seeds

Celtuce, Stem lettuce

Celtuce is the same crop family as regular lettuce. The difference is that it is bred to grow thick, succulent stalks, and that is the part eaten, raw or lightly steamed or stir-fried. It can also be pickled, or used as a gluten-free pasta substitute. Some people say the flavor of the stem is a crisp, nutty cross between romaine, celery and cucumber.

Celtuce photo from Red Wagon Farm, Boulder, Colorado

The leaves are eaten by people who like slightly bitter salad vegetables such as radicchio. Young leaves are edible about 5 weeks after planting and the stems are ready when about 12” (30 cm) tall, or shorter if you prefer. Trim and peel the stems, then chop however you like, rounds or diagonally-cut chunks. Celtuce goes well added late into miso or egg drop soup, or with tofu.

Purple Sword celtuce

Celtuce Varieties

As an Asian vegetable, Celtuce is also known as Aa choy. True Leaf Market (Kitazawa Seeds) has a Purple Sword variety. Green celtuce varieties are more widely available, such as Spring Tower from Johnny’s. I was entertained to discover that the fast-maturing spring lettuce Cracoviensis that I grew when I first moved to Virginia has since been classified as a type of celtuce. The killing temperature of outdoor unprotected celtuce is 20°F (-7°C). It bolts readily as spring starts to warm, but the leaves are not bitter and the stem is the prize!

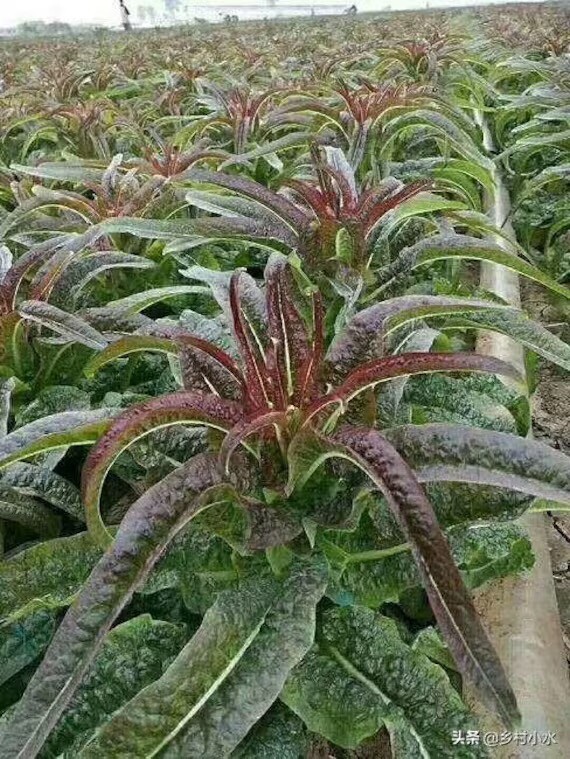
Cracoviensis lettuce, or “red celtuce”
Credit Southern Exposure Seed Exchange

Sowing and transplanting celtuce

Sow seed 1/8″ (3 mm) deep, about 1/4″ (6 mm) apart a few weeks before transplanting outdoors. For a continuous supply, sow every 2-3 weeks. Shade flats if necessary to keep the soil surface below 75°F (24°C) until germination. Transplant 8″-12″ (20-30 cm) apart in rows 12″-18″ (30-45 cm) apart.

Short term celtuce storage

Celtuce stems will keep for 3 weeks or so in a ziplock bag in a refrigerator vegetable drawer.

Jewels of Opar (Talinum paniculatum)

Jewels of Opar photo from Southern Exposure Seed Exchange

Aka fameflower, this is a heat-loving plant that can provide salad leaves in hot weather, and delicate pink flowers on spindly stems (nice filler for flower arrangements) followed by shiny ruby-red or orange-bronze seed pods, which are also useful in floral displays. Unlike celtuce, this is for those in hot climates (or try it in summer in mid-latitudes where lettuce is hard to keep growing in summer.) It grows 1’-3’ tall (30-90 cm) and as much as 2’-3’ (60-90 cm) wide. It doesn’t seem to suffer if grown thickly in the row. It forms dense mounds of succulent leaves (it’s related to purslane). The slightly succulent oval leaves make good salads or sandwich fillers. They are a nice size too: up to 4” x 2” (10 cm x 5 cm).

Jewels of Opar is a native plant and there are also cultivars such as Kingwood Gold and Limon valued by florists. It grows as a perennial in zones 8-10. It does self sow but not in a problematic way in zone 7. The evening-opening flowers attract bees and other polllinators.

Chrysanthemum Greens aka shungiku or crown daisy (Glebionis coronaria)

September-sown shungiku (chrysanthemum greens) in January.
Photo Pam Dawling

This Asian green has a distinctive flavor. It really is a chrysanthemum, not a lettuce, and not a brassica as most Asian greens are. Formerly called Chrysanthemum coronarium, Ismelia coronaria, Xanthophthalmum coronarium, or Pinardia coronaria, it also known as “garland chrysanthemum” or “chop suey greens” in English. It is known as “Kikuna” in western Japan, “tong hao” in Chinese, ssukgat in Korean and cải cúc or tần ô in Vietnamese.

 Most chrysanthemums are perennial with poisonous leaves, but shungiku is an edible annual.

The flavor of the leaves was not at all popular with our crowd. I have written about our trial of this in our winter hoophouse to attract aphid predators in early spring. (We sowed in September, but our winter was too cold for them.) There are various colors of flowers. The flowers on the ones we grew were solid yellow, not banded with other colors. We bought seed from Small House Farm. Bevin Cohen says it does attract bees, butterflies and predatory insects, and would probably do well in the winter hoophouse, and could be provoked into bolting early in the spring.

Shungiku chrysanthemum greens.
Photo Small House Farm

Rotations including unusual greens

Having non-brassica greens is a help with crop rotations.

A maximum of 1 year in 4 for brassicas is ideal to avoid disease and pest buildup. When possible, plant one year’s brassicas at some distance from the previous year’s, rather than in adjacent plots. The spread of disease can be reduced by avoiding walking through wet crops and by controlling weeds in the brassica family, such as rock cress, pepperweed, garlic mustard, and wild rocket.

Timing for fall crops 

Planting dates for fall crops can be exacting because the cooling weather slows down the plants’ growth, and a day or two delay in sowing date can mean a week or two delay in harvest date.

The number of days to harvest given in seed catalogs is based on spring conditions – plants grow faster in warmer temperatures. To determine when to sow for fall plantings, start with your desired harvest date, noting when would be too late! Consult https://weatherspark.com to estimate when it will get too cold in your location.

Next subtract the number of days from seeding to transplant, plus the number of days from transplanting to harvest for that crop (given in the catalog description), plus the length of your ideal harvest period and another 14 days for the slowing rate of plant growth in fall compared to spring.

 Some Eat-All Greens in early November. Photo Lori Katz

Eat-All Greens: Fall Cooking Greens

 Eat-All Greens were invented by Carol Deppe, who explains them in her book The Tao of Vegetable Gardening . Carol grows and breeds vegetables in Corvallis, OR, in the Pacific NW, in a different climate zone from my home in central Virginia. Carol grows Eat-All Greens by broadcasting seed of one of her carefully chosen crops in a small patch. When it reaches 12″ tall, she cuts the top 9″ off for cooking, leaving the tough-stemmed lower part, perhaps for a second cut, or to return to the soil.

I decided to modify her idea for Virginia. Fall was a promising time of year for us to try this idea, as our spring planted greens only have a short season before they bolt. And summer is too hot, winter too cold. . . We sowed 9/16, got our first harvest on 10/21, 35 days after sowing, our second on 10/28 and our third on 11/3. Unlike Carol, we sowed our greens in rows side by side, enabling us to hoe the weeds. I doubt Carol has weeds.

You can read which greens we grew and which did best in this series of three posts:

Virginian Eat-All Greens

Sowed 9/15, harvested 10/21, 10/28, 11/3

Ate more Eat-All Greens

By late December the greens were past their best. I seem not to have recorded harvests between 11/3 and 12/10, but I know there were some. We made a last harvest on 12/10, pulling the roots of the radishes and turnips we had in the mix. The daikons, Crimson Giant and White Icicle radishes did well.

Eat-All Greens part 3

We had a low temperature of 6F on January 5th that winter. Not much was left alive. Always enthusiastic to keep updating my list of cold-hardy winter vegetable crops, I took my notebook and walked the rows a few days later. Here’s a (short) list of the survivors:

Best were Morris Heading collards. Also still showing some life were Purple Top White Globe turnips, Ortolani Market Grower arugula and some (not all) of the Hanover kale (which is after all, a Siberian spring kale, not recommended for over-winter growing). I wrote up our whole Eat-All Greens experience for the January 2016 issue of Growing for Market magazine

Eat-All Greens rows with frost in December.
Photo Bridget Aleshire

I developed clear ideas of what would I do different if we do this again. No chards, no beets, no kohlrabi. Thinner seed sowing, straighter rows (easier hoeing). Try some other Asian greens? Buy some of the specific varieties that Carol Deppe recommends. Maybe sow a week earlier. And a smaller patch! It’s fun!

Successful Okra Harvesting and Beyond


Cow Horn okra pods. Photo Bridget Aleshire

This August, our okra has been doing really well. We planted 3 beds rather than our usual one or two, and the harvest was piling up in our walk-in cooler so much that we cut down one of the beds!

Okra does not like to be chilled! We need to deal with the American tendency to store almost everything in the fridge. Chilling injury of okra causes dark damp spots on the pods, which lead to pitting and slimy breakdown.

Okra can be stored at 45°F–50°F (14°C–15°C) in unperforated plastic bags for up to 15 days. This compares favorably with only 2 days without a bag or 7 days in a perforated bag. The plastic bags keep the humidity high.

Okra (Abelmoschus esculentus), a tropical annual in the mallow family, is widely adapted where the frost-free season is long enough. Those in cold climates should choose fast-maturing varieties and transplant into black plastic. In areas with cold nights, okra can only be grown in a hoop-house. Those in hot climates will need to deal with the exuberant growth in midsummer. Okra is heat and drought tolerant and has few serious pests or diseases.

I have written a few posts on okra in recent years.

Okra seedlings in Winstrip 50-cell trays.
Photo Pam Dawling

Okra Planting Time 5/11/22

Caring for your Okra Crop 7/13/22. Includes info on seed-saving.

Okra Varieties and Harvest in Sweet Corn, Potatoes and Okra7/17/19 – planting mistakes too!

Front cover of The Whole Okra by Chris Smith

A review of Chris Smith’s wonderful book The Whole Okra 4/16/19

Southern Exposure Seed Exchange has an Okra Growing Guide.

This post will fill some gaps.

Succession Planting and Renovating Okra Plants

Generally only one planting of okra is made each year, although it is possible to sow in spring and fall in hot climates, using a fast-maturing variety for the later sowing. Or sow only in the summer for a fall crop, and don’t fight cold spring soil temperatures.

Summer okra pruning. Alabama Cooperative Extension Service

In hot climates, okra plants benefit from being rejuvenated in the middle of the summer, by cutting them back (with a machete, or tree loppers) to 6” (15 cm) stubs after the first heavy harvest (perhaps in the fifth week of harvesting) and after market prices start to decline. For large areas, use a tractor mower.

The plants will produce again in the fall, when prices have risen again, and fall yields can be higher than spring crops. Side-dressing at this stage can also boost production. As well as revitalizing the productivity, this process keeps the plants at a manageable height.

Alternatively, to avoid losing all your crop at once, lop progressively along the row, perhaps cutting 5% of the plants each day, starting after they reach shoulder height. Other growers tell of cutting back plants to a height of 4’ (1.2 m), which causes the plant to branch more.

Okra Yield and Harvest

3-9 days after flowering, pods will be mature (it takes 40 days from flowering to mature seed).

For maximum yields it is important to harvest at least every second day. If pods are missed, they will mature and limit the future flowering and therefore the yield. Average yields are about 3–4 tons/acre (6.8–9 t/ha) on bare ground in the South. Yields on black plastic are considerably higher.

For smaller plantings, expect 50–100 lb/100′ (7.6–15 kg/10 m). We grow 90′ (27 m) for 100 people, which provides enough for some pickling too.

Carmine Splendor okra plant.
Photo Pam Dawling

We harvest six days a week, using pruners, or a small serrated knife. The stems are quite tough. Some people find their skin is irritated by the spiny leaves and like to wear long sleeves when harvesting. We cut Cow Horn at 5” (13 cm) or bigger. Some years we have attached a piece of card to special pruners for the job, showing the size to cut. Do not make assumptions about toughness without testing with a thumbnail, or snapping off the tip. We’ve also been surprised to find it necessary to show new people the difference between a rounded “empty” pointed flower bud, and an angular firm pod.

Our harvest starts in mid-July and runs until frost, a period of 12 weeks or so. At the end of the season, we find we need to dig out the massive trunks and consign them to a spot on the edge of the woods that we call “The End of the World.”

Pickled Okra 

Pickled okra, garlic scapes, beets, kale.
Photo by Bridget Aleshire

Okra is very tasty pickled, a good choice if you have high yields and a demand for off-season value-added products.

I found a recipe for shelf-stable pickled okra from Lana’s Cooking. I do think shelf-stable canned pickles, that don’t need refrigeration, are the best. Why fill your refrigerator with pickles when they can sit on a shelf, leaving refrigeration for fresh produce? I’m not paid to mention this website, and I admit I haven’t tried it myself, but this site has all the hallmarks of a good recipe: It has step-by-step instructions on stove-top waterbath canning, beautiful photos and clear explanations, with links to more online resources in case you need them.

Logo for Lana’s Cooking

The ingredients are fresh okra, vinegar with 5% acidity, garlic, dill seed, pure canning salt, and whole black peppercorns. There’s a printable recipe card at the end of the post, for those who enjoy a screen-free kitchen. Fill the jar tightly with okra pods standing on the blunt ends (tips up). Add a whole peeled garlic clove and the salt and spices. If you like hot spicy pickles you can add a little hot pepper. Pack more okra (tips down this time) into the jars, without crushing the pods. Fill the jars with a hot vinegar and water mix. See the recipe for all the details you’ll need. For instance: “Process for 10 minutes for altitudes up to 1,000 ft; 15 minutes for altitudes 1,001 – 6,000 ft; and 20 minutes over 6,000 feet.” Nothing is left to guesswork or chance. Best flavor is achieved 4-6 weeks after canning, and you can store the canned pickles for a year (maybe more, but you will probably have eaten them all before then, so don’t worry!)

A full jar of pickled okra. Photo from Lana’s Cooking

Unusual Crop for August: Kohlrabi

Harvested kohlrabi, Early White Vienna and Early Purple Vienna.
Photo McCune Porter

Unusual Crop for August: Kohlrabi

 In May I wrote about Peanuts

In June I wrote about Bug-Resistant Summer Squash Substitutes

In July I wrote about Squash Blossoms and Other Edible Flowers

Much of this information comes from my book Sustainable Market Farming 2nd Edition.

This month, I’m writing about kohlrabi, an eye-catching and very storable brassica crop. Kohlrabi can be grown in central Virginia where I live in spring and in fall. In cooler climates it can be grown in summer, and in warmer ones through the winter. The winter-kill temperature for kohlrabi grown in the open, with no protection, is 15°F (–9.5°C), similar to red chard, Russian kales, and some varieties of beet, broccoli, cabbage. Kohlrabi production is like that of other brassicas, and the methods of cultivation and harvesting are very similar.

Kohlrabi is an unusual crop that is sure to attract attention at your market booth or be a discussion piece in CSA bags, in your garden and on your table. It is a swollen stem base, with leaves individually sprouting from the globe. When the tap root and leaves are trimmed off, it resembles a sputnik (the first manufactured Earth satellite, in 1957). It is tender and crunchy with a flavor between a cabbage and a turnip. It’s easy to grow and doesn’t wilt as soon as you harvest it. It can be eaten raw (sliced or grated) or cooked, and the leaves can also be cooked and eaten. It stores well, offering flexibility about when it is eaten or sold, which is always an advantage for growers.

Kohlrabi can be direct sown or transplanted, whichever suits you best.

Kohlrabi Crop Requirements

Brassicas grow best on fertile well-drained soil with adequate moisture. They require a lot of potassium, so a sprinkling of wood ash, kelp meal, or granite dust could be helpful if your soil is a bit short of potassium. Calcium, boron, iron, manganese, and molybdenum are also important for good brassica crops – healthy, biologically active soils can usually supply enough of all these. If not, amend as needed. Optimal growing temperatures for most brassicas are 60°F–65°F (15°C–18°C).

Green kohlrabi.
Photo Small Farm Central/Harvie

Cover Crops before Fall Kohlrabi

Because fall brassicas are transplanted in summer, it’s possible to grow another vegetable crop, or some good cover crops, earlier in the year. An overwintered cover crop mix of winter rye and crimson clover or hairy vetch could be disked in at flowering and followed by a short- term warm-weather cover such as buckwheat, soy, or southern peas, all before the fall kohlrabi. A spring-sown cover crop mix of bell beans (favas), barley, and oats does well before all fall brassicas at Roxbury Farm in New York, supplying all the nitrogen required by the brassicas, which are heavy nitrogen consumers. To minimize pests and diseases, don’t use brassica cover crops.

Rotations Including Brassicas

A rotation of 1 year in 4 is ideal for brassicas to avoid disease and pest buildup. When possible, plant one year’s brassicas at some distance from the previous year’s, rather than in adjacent plots. The spread of disease can be reduced by avoiding walking through wet crops and by controlling weeds in the brassica family, such as rock cress, pepperweed, garlic mustard, and wild rocket.

We always plant our kohlrabi in permanent raised beds as we cultivate these with a BCS walk-behind tiller and can work them a bit sooner than the flat fields, where we must wait for the soil to dry enough to use the tractor and disks.

Kohlrabi Varieties

Interest in kohlrabi is growing.I’m encouraged to see that Johnny’s now sells 7 varieties, Fedco has five, Baker Creek has 6 and High Mowing has 8!

We like the open-pollinated Early White Vienna and Early Purple Vienna (58 days from sowing) and the purple hybrid Kolibri (45 days), which is more expensive but beautiful, quick-growing, and uniform. Purple varieties seem slightly more resistant to cabbage worm and also less susceptible to cracking. A mixture of the white (green) and purple colors looks very attractive, and they’re both white under the skin, so our strategy is to grow 25%–35% purple and mix them in; 4 g = about 1,275 seeds, sows 135′ (41 m). 5,500–9,000 (avg. 6,500) seeds/oz, (200–320, average 230 seeds/g).

Superschmelz kohlrabi (60 days from transplanting) can also be summer sown for fall harvest. It produces 8″–10″ (20–25 cm) bulbs, which are an attractive globe shape and remain tender. The world record (variety not disclosed) weighed almost 97 lbs (44 kg), leaves included.

Kossak (80d to maturity) is a good storage variety that maintains its sweet, delicious, and tender dense white flesh in storage for 2–4 months.

The other type of kohlrabi is the slower-growing giant winter storage variety, such as Gigante (130 days from sowing in spring for late fall harvest). It regularly exceeds 10″ (25 cm) in diameter and 10 lbs (4.5 kg) in weight. Gigante’s crisp, white, mildly tangy flesh doesn’t get woody even when it gets enormous.

A September sowing of kohlrabi. Too late in the year to thin and grow to full-size, kohlrabi makes good salad and microgreens. Photo Bridget Aleshire

How Much Kohlrabi to Grow

We grow 360 row feet (110 m) of fall kohlrabi for a hundred people. We sow in mid-late July, and transplant around July 29–August 12 at 8″ (20 cm) apart in the row, with 9″–10″ (23–25 cm) between rows – 4 rows in a 48″ (1.2 m) wide bed. If direct sowing, you could sow in drills or in stations (groups of several seeds sown at the final crop spacing).

Systems for Growing Kohlrabi Transplants

The same systems you use for growing transplants in spring may also work well for fall: flats, cell-packs, outdoor nursery beds. We use an outdoor nursery seedbed and bare-root transplants because this suits us best. The nursery bed is near our daily work area so we’ll pass by and water it. (Our greenhouse is off to one side of our gardens.) We’re always relieved to close the greenhouse transplant season in May, as we no longer need to water little plants many times each day to keep them alive. Having the seedlings directly in the soil drought-proofs them to some extent; they can form deep roots and don’t dry out so fast.

Other people manage fine with flats in June and July, but we avoid it. If you use flats, it can help to have them on benches in an enclosed shadehouse, or outdoors, above the height of flea beetles. Ira Wallace of Southern Exposure Seed Exchange tells me 3′ (1 m) is high enough. Richard Jones, in his book Beetles, says flea beetles can jump at least 100 times their body length.

For our seedbeds, we use insect netting (ProtekNet) on wire hoops. In warm weather, I prefer netting against bugs because it lets in lots of air. Rowcover also protects against bugs, but provides less airflow, which can make the seedlings more likely to die of fungal diseases in hot weather.

Kohlrabi is a less-common brassica. This is Early Purple Vienna. Photo Kathryn Simmons

Germination of Kohlrabi Seeds

The most challenging part of producing fall brassicas is getting the seedlings growing well while the weather is hot. Unlike some cool-weather vegetables such as spinach, brassicas will germinate very well at high temperatures: the ideal is 77°F–85°F (25°C–29°C), but up to 95°F (35°C) works. Given enough water, summer seedlings will emerge in only 3 days. Once they have emerged, the challenge begins. As well as temperature and moisture in the right ranges, the seedlings need light (very plentiful in midsummer!), nutrients, good air-flow, and protection from bugs. Guarding the plants from bugs is the most challenging for us. We deal organically with flea beetles, harlequin bugs, and, sometimes, cabbage worms. Our main defenses are farmscaping and insect netting.

Search my previous posts for more on pest control. Brassica pests seem less interested in kohlrabi than in other brassicas, and as people are less likely to eat the leaves, there is room to tolerate a certain number of leaf-eating pests, while still having an attractive crop and a high enough yield.

“No visible brassicas” month

In an attempt to break the relentless lifecycle of the harlequin bugs, we now try to have a month from late June to late July with no brassicas visible in our garden. We make sure to mow down the spring broccoli trunks, the kale, and collards and harvest or pull up any other brassicas. We net new transplants and remove the netting a month later, allowing us to hoe and weed.

Brassica seedlings under Proteknet.
Photo by Bridget Aleshire

Timing for Fall Kohlrabi

Planting dates for fall crops can be exacting because the cooling weather slows down the plants’ growth, and a day or two delay in sowing date can mean a week or two delay in harvest date. Although it can be hard to think about sowing seeds in midsummer, it’s very worthwhile because brassicas develop delicious flavors as they mature in the cooler fall days,. Weeds and pests slow down then, too – once established these crops need little care.

The number of days to harvest given in seed catalogs is based on spring conditions – plants grow faster in warmer temperatures. To determine when to sow for fall plantings, start with your desired harvest date (noting when would be too late!), then subtract the number of days from seeding to transplant (21–28), plus the number of days from transplanting to harvest for that variety (given in the catalog description), plus the length of your ideal harvest period and another 14 days for the slowing rate of plant growth in fall compared to spring.

Example: Early White Vienna Kohlrabi, 58 days from sowing to harvest in ideal weather.

  • Consult https://weatherspark.com to estimate when it will get too cold in your location to leave kohlrabi in the ground. Here, in winter-hardiness zone 7a, our average annual minimum temp is 0°F-5°F (-15°C to -17.7°C), although most winters don’t reach those temperatures for very long. Our average winter low is about 25°F – 32°F (-4°C to 0°C).
  • Kohlrabi is hardy to 15°F (–9.4°C). The temperature is not likely to drop to 15°F (-9.4°C) before the beginning of December here.
  • Adding 40% more time, allowing 80 days, we could sow kohlrabi in early August and get a crop at the end of October.
  • Or mid-August for early November.
  • Or early September for the end of November or very beginning of December.
  • If you sow too late, use the seedlings for salad. Kohlrabi also makes a good microgreens crop.

Sowing Kohlrabi Seeds

Our rough formula for all transplanted fall brassicas is to divide our final crop row length by our in-row plant spacing and then sow extra to be sure of having enough good ones on transplant day. For kohlrabi to be planted 8″ (20cm) apart, to plant 360’ (110 m) we’ll need 540 perfectly lovely transplants.

We aim to sow 3 seeds/inch (1 cm apart). We make two sowings one week apart, to ensure we have enough plants of the right size. Each week after the first sowing, we weed the previously sown plants, and thin them to 1″ (2.5 cm) apart. We resow to make up the numbers if germination is low.

Young kohlrabi plants.
Photo Kathryn Simmons

Transplanting Kohlrabi

We aim to transplant most brassicas at four true leaves (3–4 weeks after sowing). It is better to transplant crops at a younger age in hot weather than you would in spring because larger plants can wilt from high transpiration losses. If we find ourselves transplanting older plants, we remove a couple of the older leaves to reduce these losses.

We transplant in late afternoon or early evening. We water the soil in the plot if it is dry, because it is very important at this time of year to get adequate water to the plants undergoing the stress of being transplanted. Likewise, good transplanting technique is vital. With drip irrigation, you can more easily give a little water in the middle of each day, which will help cool the roots. With only overhead sprinklers, you may not have the option of watering every day.

Bed of young kohlrabi. Kathryn Simmons

Kohlrabi Harvest

Harvest storage kohlrabi while the anchor (tap) root is still round, before it begins to elongate. We harvest our Vienna kohlrabi from October 20 to November 15. For storage cut off the tuft of leaves at the top of the plant and also the wiry root. It’s easiest to cut a disc off the bulb rather than try to cut through at the point between the bulb and the wire, where it is very tough.

Kohlrabi Winter Storage 

Kohlrabi can be stored in a refrigerator or refrigerator-like conditions such as a CoolBot, 32°F–40°F (0°C–5°C), 80%–95% humidity. Basically Cold & Moist. Kohlrabi stores well in perforated plastic bags in a walk-in cooler. In a plentiful year, we have eaten stored kohlrabi throughout the winter into early spring.

Front cover of Beyond the Root Cellar book by Sam Knapp
Cover of Beyond the Root Cellar by Sam Knapp


A Few More Good Resources for Storage Information

Unusual Crop for July: Squash blossoms and other edible flowers


Zucchini flower beignets. https://www.sbs.com.au/food/recipe/fried-zucchini-flowers-beignets-de-fleurs-de-courgette/8iuji2klg 

In May I wrote about Peanuts

In June I wrote about Bug-Resistant Summer Squash Substitutes

This month, I’m writing about edible flowers, starting with squash blossom beignets.

Which Squash Varieties to Grow for Blossoms

Any summer squash, zucchini or winter squash blossoms can be used for beignets, which are a kind of fritter. Usually the male flowers are used, as harvesting female flowers would eliminate their chance of producing squash. Squash blossoms only live for a day, so you can’t have both blossom and fruit from the same flower.

If you are pulling up or tilling under a row of squash because you have too many, there is no reason not to cook the female flowers as well as the males. Female flowers have tiny squash developing immediately behind the flower. Male flowers have longer thin stems. In the first photo of Gentry yellow squash below, the flower is a male. The immature squash have thicker stems. The second photo shows a female flower with a tiny squash developing behind it. the flower is still fresh, showing you the developing squash will be quite obvious, even at a very young stage.

Gentry yellow squash with a (thin-stemmed) male flower prominent, and several small squashes.
Photo Pam Dawling
Golden Glory zucchini. Open, disease-resistant plants. A female flower with a tiny squash behind it is in the center of the photo. See the striped cucumber beetle poking its head out of the flower? Photo Pam Dawling

If you want to grow plants mainly for the blossoms, choose a vining zucchini, as these produce the most and the biggest flowers. Costata Romanesca is a good large bush one that also produces tasty zucchini.

Costata Romanesco zucchini. Fedco Seeds photo.

Butter Blossom was a zucchini developed specifically for blossoms, but seems no longer available. The web directs me to Butterbush, which is a compact bush butternut, slow developing and not sounding promising.

Johnny’s Selected Seeds has a short video on this topic:

Harvesting Squash Flowers

One trick is to be ready to harvest blossoms early in the season when the plants produce an initial flush of male flowers. Don’t kill your golden goose, though, by removing all the male flowers and leaving no chance of pollination. You can leave some male flowers on the plants once there are female flowers, and/or use a paintbrush to transfer pollen from male flowers to the stigmas of female flowers as soon as they open in the morning. Don’t dally, as once the female flowers close, you’ve missed your chance.

Harvest the blossoms early in the morning, while they are still crisp. You can use either closed or open flowers for beignets. The advantage of open flowers is their size compared to unopened flowers. Their disadvantage is that they might contain insects, so be sure to check and shake our any you find.

Snip through the stems with pruners and gently settle the flowers in a very clean tote. Some cooks remove the stems and sepals before dipping in batter, but you can use the stem as a handle and remove it later. Or let the diners deal with it. Don’t wash the flowers, as this can make the batter soggy. Simply discard any grubby flowers.

Cooking Beignets

Fried Zucchini flower beignets. https://yourguardianchef.com/fried-zucchini-flowers/

I’m no cook, but basically you make a batter, as simple or fancy as you like, using two cups of plain flour for around 15 open flowers. Batters with and without eggs work equally well, I am told. The batter should be a little thinner than pancake batter.

Heat an inch or more of oil in a pan, dip the blossoms in the batter until well-coated, then fry in hot oil for a few minutes, turning as needed. Drain, salt, and serve hot. Cooked beignets can be frozen for reheating later, although to me that sounds a poor choice compared to eating them immediately!

Some recipes suggest you use either a tempura type batter, or chili relleno style fluffy batter. Some recipes stuff the flowers before frying with soft cheese, garlic, herbs, Parmesan.

These are a fun, delicate treat, not a belly-filling farmer dinner, and we all need some fun in our lives!

Tiny squash can also be used for beignets, and squash vine tips can be cooked the same way or stir-fried without batter.

Squash vine shoots for cooking. Photo Irena Hollowell

Other Edible Flowers

There are plenty of other edible flowers, mostly used in salads or as garnishes, without cooking them. Johnny’s has a good selection and also a 4-page printable guide. Both links are full of inspiring photos. They recommend nasturtiums, calendula, bachelor’s buttons for salads; marigolds, dianthus and violets for garnishes; mint, basil and borage flowers to flavor summer drinks; beebalm, anise hyssop and marigolds to add zip to desserts. Arugula, fava bean, pea, mustard and strawberry flowers also feature in their Edible Flowers Guide, along with more herb flowers, snapdragons, stocks, sunflowers (I just learned the whole sunflower plant is edible, which conjures up quite an image!).

Nasturtiums planted in with squash to deter pests. 
Photo Pam Dawling

Garden Betty,  whose writing I am quite a fan of, has a huge and beautiful post on edible flowers, including many not yet mentioned here: alyssum, amaranths, begonia, catmint, celosias, chamomile, clovers, cosmos, dahlias, dandelions, daylilies, dianthus, echinacea, evening primrose, fuchsia, phlox, gardenia, gladiolus, hibiscus, hollyhock, honeysuckle, hostas, impatiens, jasmine, lilac, nigella, okra, orchids, petunias, plumeria, primroses, roses, stocks, tulips, yarrow, and zinnias.

Yarrow flowering in our hoophouse, to attract beneficial insects. The flowers are edible.
Photo Pam Dawling

I recommend this site and its clear photos, for anyone venturing into new flower-eating territory. Garden Betty (Linda Ly) describes the flavor profile of each plant. Her list is compiled from all the flowers she’s personally tasted over the years.

She cautions about harvesting and eating flowers you don’t know, or that might be contaminated with pesticides. Start with small quantities if you are uncertain of the ID, especially if you tend towards allergies and sensitivities. She gives the Latin botanical names, so you can be sure of any you are growing from seed.

This site also gives links to books, such as her The No-Waste Vegetable Cookbook, her How to Eat the Parts of Plants You Didn’t Know You Could Eat and 28 Edible Weeds and Invasive Plants That Are Actually Delicious, for sale as a digital downloads.

The No-Waste Vegetable Cookbook by Linda Ly

A Few More Good Resources

University of Minnesota Extension Edible Flowers

Food Garden Life

10 Poisonous Flowers You Should Never Eat

See Thompson and Morgan’s Edible Flowers Guide

Unusual Crop for June: Plant Bug-Resistant Summer Squash Substitutes

Bug-Resistant Summer Squash Substitutes 

Tromboncino Squash. Southern Exposure Seed Exchange

Most summer squash and zucchini are in the species Cucurbita pepo. They are easy to grow —the main challenges are pests, diseases, and moderating the quantities available. These crops can crank out high yields of a vegetable almost everyone likes.

Where insects are a problem for summer squash, vigorous plants of other squash and gourd species can bear all season in those areas. Growers with bad pest problems can try:

  • Tromboncino squash (60d OP), a C moschata squash; Light green fruits grow long, curving to a bell at one end. Vigorous vining plants that can be grown on a trellis. Harvest at 8”-10” (20-25 cm) long when the flavor is fine and sweet. Southern Exposure Seed Exchange. On the coast of France and Italy, Tromboncino d’Albenga and Trompette de Nice were traditionally grown as summer squash and a few fruits left to ripen for winter storage.
  • Zucchino Rampicante (60-70d OP) C moschata; Italian heirloom, vigorous vining squash; long slender 15” (38cm) fruit with a bulb at the bottom. One of the best eating summer squash: very tender, mild tasting. The long neck makes great slices with no seeds in them! Insect and disease resistant. Baker Creek.

    Rampicante squash. Baker Creek
  • Tromboncino and Rampicante are closely related, if not the same.
  • Long de Nice (C moschata); Fruit range in size between 10-20 lbs (4.5-9 kg) each with a long neck and fine-grained flesh with few seeds. Vines spread at last 15ft (4.5m), consider trellising. One or two full-grown squash per vine, but you’ll get more if you harvest them immature. Generally not as long as Rampicante or tromboncino. Baker CreekLong de Nice squash. Baker Creek
  • Luffa (Luffa acutangula and aegyptiaca vegetable sponge, 65d OP, zones 7-13), Very long vines, consider trellising. Tastes similar to summer squash when harvested at 4” (10cm) for eating raw, pickled, cooked with other vegetables. The mature fruits are harvested when the skins dry brown, to use as vegetable bath sponges or pot scrubbers, with an incidental seed harvest at the same time.

    Maturing Luffa. Seed from Survival Garden Seeds
  • Cucuzza (Lagenaria siceraria, snake or serpent gourd, 60-75d OP grows in zones 2a-11b.) Cucuzza edible gourds have more resistance to squash bugs. Just be sure to harvest them relatively small (while skins can be pierced by a fingernail, 12” (30cm) max) for good flavor. These are very vigorous, sprawling plants, which, happily, are also prolific. One option is to plant a row of regular zucchini alternating with these bigger plants —when the zucchini succumb to disease, the sprawlers will take over. Vines can reach 25’ (7.6m)

    Cucuzza Seeds from Italy.
    Growitalian.com
  • Lunga Da Pergola (Lagenaria siceraria, 60d to 6” (15 cm) fruit). Edible gourd, vigorous vines. At its best small, about 6” (15cm) long, when fruits will be slightly sweet and tender. Fruit can grow up to 5’ (1.5 m) long. A very productive strain with white mottling on the gourd and leaves.

    Serpent Gourd Lunga di Pergola. N E Seeds

Some zucchini varieties are especially attractive to cucumber beetles and may be grown as a trap crop: Cocozelle summer squash, Seneca, and Dark Green zucchini. When beetles accumulate in the trap crop, flame it or till it in.

Crop Requirements for Squash and Gourds

Summer squash thrives on high levels of organic matter. Although only a light to moderate feeder for nitrogen and phosphorus, it requires quite high levels of potassium. Foliar seaweed spray can be used to make up for nutrient deficiencies. This crop does best with plentiful, but not excessive, moisture. That said, be careful not to overwater the seeds before they germinate, or they will rot.

This frost-tender warm-weather crop germinates at 60°F (15.5°C) minimum and does best at 85°F (30°C). Germination takes 5–10 days. During growth the ideal temperatures are 75°F–85°F (24°C–30°C) in the day and 65°F (18°C) at night.

Sowing Squash and Gourds

Seed can remain viable for up to 5 years, if stored in a cool, dark, dry place. Seeds should be sown 0.5″–1″ (1–2.5 cm) deep, 6″–12″ (15–30 cm) apart, in widely spaced rows if you are not trellising. Sow deeper in hot weather, when it helps to turn on the drip irrigation, and sow each seed right by an emitter. Water at sowing, then not again until seedlings emerge. For a slightly earlier harvest, you can pre-sprout the seed.

Covering the row with netting will keep the pests away. If possible, use hoops or a rope above the row, pulled taut between stakes, to hold the netting above the leaves, as cucurbits are susceptible to abrasion damage. Remove the netting as soon as you see female flowers, to allow for pollination.

Transplanting Squash and Gourds

When transplanting squash, take care to disturb the roots as little as possible. If you sow 2 seeds in each cell, be sure to pinch off the smaller one as soon as possible to remove the competition.

As soon as the plants have one or two true leaves, at about 3–4 weeks of age, transplant in a mild spell, burying the entire stem below soil level, up to the seed leaves (carefully!) to protect it from damage. Cucurbits started indoors grow long spindly stems, which are quite fragile. Make the hole deep enough, slip the plant out of the container, perhaps on the blade of a knife, pop it into the hole, and close up firmly.

Plant 2’–3′ (60–90 cm) or more apart in the row. Transplanting allows a crop to be established earlier than would be possible with direct sowing in spring. Alternatively, a crop can be gained from a summer window in the planting schedule for a bed, after an early spring crop. Transplants do not grow as sturdy a root system as direct sown squash do, so I would not recommend transplanting if direct sowing is possible.

Pests of Squash

Squash bugs are probably the most common pest. The adults are long gray insects that emerge from overwintering in wooded areas once temperatures reach about 70°F (21°C). They are more attracted to pepo squash than they are to moschatas. Plants attacked by squash bugs look baked to a crisp, with curled bronzed leaves. Squash bugs can do a lot of direct damage to leaves, and they also vector yellow vine disease. They feed on young seedlings for preference and lay groups of spaced bronze eggs on the undersides of leaves. The eggs hatch in 10 days, and the nymphs suck sap from the plants. There are many generations each year, and numbers quickly build. Drop handpicked adults into soapy water rather than crushing them as the smell of the crushed bugs attracts more. It is also possible, but not easy, to crush the hard-shelled eggs. An alternative is to tear off egg-covered leaf pieces and drown the eggs in soapy water. Squash bugs can be trapped overnight under boards on the soil near the plants —in the morning, lift the boards and collect the bugs.

For more info on squash bugs, see the ATTRA publication, Squash Bug and Squash Vine Borer: Organic Controls, that includes pest lifecycles, systems-based management practices, mechanical and physical practices, and biological and botanical controls. Buckwheat can be interplanted to attract tachinid flies that parasitize squash bugs.

Striped cucumber beetles are our worst pests some years, even compared to squash bugs. In the hoophouse, we handpick the adults inside squash flowers in the mornings while they are still sluggish. Long pointed tweezers are our tool of choice. Our hope is that, by battling this first generation, we will reduce numbers for the rest of the season. To attract beneficial insects that are predators or parasites of the cucumber beetle, grow buckwheat, cilantro, dill, or winter peas near the squash plants, timed so that they flower when the rowcover or netting is removed from the squash plants. Another method of reducing pest attacks, especially useful after flowering, is Surround kaolin clay spray. It does need renewing after rain or overhead irrigation. If all else fails and action is imperative, Spinosad will kill them (and some other insects too).

The adult squash vine borer is a fairly large orange-and-black fuzzy moth with glassy black wings. It is active in May and early June, and there may be a second generation in late July/early August. The small flat brown eggs are laid singly at the base of the stem. The larvae hatch after 1 week, and are white with a brown head. They spend 4–6 weeks in the stem, eating upwards and growing to 1″ (2.5 cm) in size. Then they dig into the soil and pupate for the winter.

Plant symptoms include wilting of the whole plant and stem holes surrounded by frass (caterpillar poop). To save the plant, act at the first sign of trouble and pick out the grub, then pile soil over the injury to help the plant recover. Injecting Bt (Bacillus thuringiensis) into the stem is another solution. For prevention, rotate crops and use netting or rowcover over plants until flowering. Another technique to try is pinching out the growing tips of the vine when it is 1’–2′ (30–60 cm) long, which causes the plant to branch and increases the odds that some part of it will survive.

Diseases of Squash and Gourds

I haven’t yet done a Plant Diseases of the Month Series, so I’ll include info here.

  • As always, aim to avoid diseases by ensuring good air flow and appropriate water levels.
  • Powdery mildew (PM) (a white coating starting on older leaves) is a common fungal disease in hot dry weather. Drip irrigation helps reduce the spread of PM, compared to overhead irrigation.
  • Downy mildew (yellow angular spots with leaf curling and a purplish cast to the undersides of leaves) happens in cool wet weather late in the season, and plants can recover if the weather heats up.
  • Anthracnose (dark brown spots on the leaves and round sunken spots on the fruit) is a fungal disease worse in warm wet weather from mid-season onwards.
  • Angular leaf spot, Pseudomonas syringae pv. lachrymans (browning of the leaf between the veins and small round spots on the fruit) is a bacterial disease more common in cool damp weather. The symptoms can resemble those of downy mildew.
  • Black rot/gummy stem blight (Didymella bryoniae) is a fungus occurring with wet soils, in wet weather (cool or warm).
  • Mosaic viruses can be spread by aphids. Succession cropping helps evade these.
  • Bacterial wilt (Erwinia) causes sudden dramatic wilt and death of the whole plant. It is spread by cucumber beetles.

This post is adapted from a chapter in my second edition of Sustainable Market Farming, with some additional information on squash varieties.

Front cover of Second Edition of Sustainable Market Farming book
The second edition of Sustainable Market Farming, release April 15, 2025

Unusual Crop for the Month: Plant Peanuts in May

Tennessee Red Valencia peanut.
Photo Southern Exposure Seed Exchange.

Peanuts are an interesting and rewarding crop to grow on a small scale. Growers who offer farm tours will enjoy showing how the flowers “peg down” to develop the nuts under the soil, those concerned about local food security will appreciate peanuts as a source of locally grown protein and oil; and everyone can enjoy the challenge of trying a new crop.

Peanut Crop Requirements

Peanuts need a frost-free period of at least 110 days. Virginia type peanuts require 2,520–2,570 growing degree days (GDDs) above a base of 57°F (14°C). Consult Weatherspark.com to make sure you have enough frost-free days. One way of tracking GDDs is on the Climate Smart Farming Growing Degree Day Calculator website from Cornell, which can show you the season to date and the 6-day forecast, as well as the 15-year average and the 30-year “normal” for your location.

Peanuts like warm or hot conditions, with adequate but not excessive water. If you can provide these conditions, as well as relatively light, loose, free-draining soil and attention to controlling weeds, then I encourage you to give peanuts a try. We plant our peanuts in a raised bed, which helps provide looser soil. They can be hard to lift from heavy soil.

Carolina Black peanut. Photo by Southern Exposure Seed Exchange.

We get our seed peanuts from Southern Exposure Seed Exchange. Twenty-eight grams will plant about 25′ (7.6 m). Prepare a bed or row ahead of time. You can warm the soil by covering it with rowcover or plastic for 3–7 days before planting. The pH should be 5–6, and if calcium levels are at all low, add gypsum — the start of blooming is the latest time you can effectively do this. Calcium deficiency results in unfilled pods and low yields (see the “Peanut Production Practices” chapter in the annual Peanut Information publication from NCSU Extension for more on soil nutrient requirements). The NCSU website also has an interesting “Peanut Risk Tool and Field Log.”

Those thinking of pre-sprouting or transplanting peanuts should be alerted to a peculiarity of the crop: they do not germinate well without soil. Exactly what peanuts need from the soil remains a bit of a mystery. So if you want your peanuts to get an early start, don’t try to sow them in a soilless mix, or in paper towels or a glass jar. To successfully transplant peanuts, use actual soil or a sand/compost/soil mix.

Peanut Varieties

Carwile’s Virginia peanut. Photo by Raddysh Acorn for Southern Exposure Seed Exchange

If you have a relatively short growing season, I recommend starting with the 110-day variety  Tennessee Red Valencia. It’s easy to grow, very productive and has large sweet kernels, 2–5 per shell. If you don’t want to hill, this variety is said to be the most accepting of this. Another 110-day variety is the unusual Carolina Black, an heirloom with a black skin. It’s sweet-tasting and slightly larger than the Spanish varieties. Virginia Jumbo needs 120 days, produces large rich-flavored kernels, 2 per shell, and prefers loose soil. Whopper also needs 120 days, and its claim to fame is obvious. Carwile’s Virginia is a 130-day heirloom variety with superior flavor and good drought resistance (though only average disease resistance). MorningChores.com has an excellent beginner description of seven pests and two diseases. Peanuts are prone to the same diseases as beans, with bacterial wilt being especially damaging. Sclerotinia blight is more prevalent at high pH.

Morning Chores’ Beginners Guide to Growing Peanuts

Sowing Peanuts

Sow around the last frost date. The soil temperature should be 65°F (18°C) at noon, at a 4″ (10 cm) depth, for 3 consecutive days. For us that’s late April. May is safer. Count back from your first frost date to find your last sowing date. The beginning of June is about the latest I’d want to try here. Shell the nuts (don’t split the kernels into halves) and sow 2″ (5 cm) deep, 12″ (30 cm) apart, in rows 30″–36″ (76–90 cm) apart. Inoculating the seeds with Rhizobium bacteria can produce enough nitrogen in root nodules to sustain the crop, as with other legumes. Active nodules are pink or red inside.

The seedlings may be slow to emerge, so preemptive weeding may be needed. If you have not interplanted, you could try pre-emergence flame-weeding. Peanuts are native to an area subject to periodic drought and fire, and have evolved to withstand heat. You can flame them soon after emergence, as the growing point is still in the soil. Older peanut plants may be damaged and then recover. The seedlings look somewhat like peas or clover. Because they grow slowly for the first 40 days, they will not thrive if you lose them in weeds (guess how I know?). Flaming or careful hoeing as soon as the peanuts emerge will effectively deal with broadleaf weeds. Grasses are not killed by flaming.

Small peanut plant . Pinterest photo

Peanut Cultivation 

Once the seedlings are 12″ (30 cm) tall, you can hill them up, as you would potatoes, to increase yields. We skip this step —the peanuts have no difficulty pegging in the loose soil of our raised beds. We’ve grown Virginia Jumbo and Carwiles without hilling and got plenty of peanuts. But if you are not interplanting and have a good hiller attachment on a tiller or wheel hoe (or a visiting school group, perhaps), then hilling can deal with weeds and provide more loose soil for the nuts to develop in. Avoid disturbing the soil after pegging has begun.

Watering Peanuts

There are two periods when adequate watering is vital. The first is at planting, to ensure germination. The second is from 50 days after planting, when pegs start to enter the soil, until 2 weeks before harvest. This is the time when the pods are filling. Stop watering 10–14 days before harvest, to help the peanuts dry for storage.

Harvesting and Drying Peanuts

You can wait for a light frost to kill the tops, or you can simply harvest when enough peanuts are mature. You’ll have to dig some up and open them to see. The University of Florida has a helpful publication, “Methods to Evaluate Peanut Maturity for Optimal Seed Quality and Yield.” If the fall is wet, it might be best to pull or dig the plants early, when the seed is almost ripe, and dry them indoors. This will minimize losses from rotting.

Varying pod sizes on a peanut plant. Removal of all pods is critical, from match heads to full-size pods.
Credit: Ethan Carter, UF/IFAS

In dry light soil, you can just pull the plant, and the peanuts will come up attached to the stems. Then you can bunch and hang them in an airy barn. Mice really love peanuts and will run off with them and stash them at a phenomenal rate, so be sure to set traps or provide a good cat. If the soil was dry and loose enough for you to pull the plant, the nuts will likely be relatively clean, so you can dry (and cure) them on the vine, which takes up to 3 weeks.

In heavier soils, dig the plants up lightly — no need to go deep. You can pull the nuts off the stems by hand and gather loose ones from the soil. For small-scale production, you can strip peanuts off the vines by dragging the plants through a V-shaped piece of equipment, from the far side towards yourself, letting peanuts collect in a tote.

If needed, wash the peanuts, spreading the loose ones out on trays to dry. Mold is an enemy when drying: moldy peanuts contain toxic aflatoxin, so get them dried quickly. Set up fans indoors, or dry the peanuts outdoors in the sun: 3–7 days is a likely amount of time. You could spread the peanuts on screens on wheelbarrows. Just wheel the barrow from place to place to catch the sun, and under cover if rain threatens. A second screen inverted over the first keeps mice away. This system works for very small-scale production. You could make mouse-proof lidded trays from rat wire and dry the peanuts on greenhouse benches, with fans.

Curing and Storing Peanuts

If vine-drying, you can also cure the peanuts on the vine, as described above. Otherwise pick the good nuts off the plants once they have dried and cure them in the sun for a few days. Peanuts will cure to a storable state in 2–3 weeks indoors at ambient temperatures or 6 days in a solar dryer of the type described in my book. It’s important not to heat the nuts higher than 85°F (29°C). Drying too fast causes skin slippage and kernel splitting. To find out when peanuts have finished curing, taste some. If they still have the watery crunch of water chestnuts, they are not ready; once they taste good, they’re cured. For long-term storage, a sealed container in a freezer works well. They need to be kept very dry. Like most seeds, peanuts are very good at drawing moisture from the air.

Boiled Peanuts
Photo https://www.daringgourmet.com/boiled-peanuts/

Boiling Peanuts

Immediately after harvest, you can eat all or some of your bounty, without drying or curing. These are a big hit! Here’s how we cook them for a party: fill a large pot two-thirds full of water, add 2 handfuls of salt and enough peanuts (in their shells) to fill the pot, but still have enough room to move. Cook for 5 whole hours, strain, and serve.

Roasting Peanuts

To roast peanuts, spread them shelled or unshelled in a single layer and cook at 350°F (175°C) for 20–25 minutes in the shell, or 15–20 minutes shelled.

Read More

This post is adapted from a chapter in my second edition of Sustainable Market Farming. The chapter in that book also includes peanut history, information on growing peanuts in a hoophouse, interplanting lettuce and peanuts, solar drying them, and saving seed.